Using supplies that I had on hand, and re-purposing a toilet paper roll, I came up with a cute Valentine to hold some Hugs & Kisses.
Supplies:
Toilet paper, Paper towel, or gift wrap rolls
Tissue paper (mine shown is being repurposed, works perfect for this project)
Cardstock
Stamps
Inks
Glue Stick
Paper Trimmer
Ruler
Paint and Sponge Brush
White or Silver Gel Pen (not shown)
Ribbon for tying
Candies
First you want to measure the length and width (circumference) of your Toilet paper Roll.
Trim paper to correct size.
I didn't have any Valentine Theme printed patterned paper (I have NO Idea why???) so I decided to make my own. (*Remember I'm keeping this task to supplies on hand. ) So I used the "Happy Valentine's Day" stamp I had, and using red ink, stamped the image to the center of the paper.
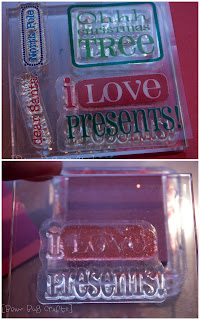
Again, like paper, I don't have a lot of Valentine Day stamps so I'm using a Christmas stamp so I can stamp the word "Love". I've only applied red ink to the love portion and then stamped my paper. The clear stamps make this step so much easier!
I took my paper and started to apply "stitches" with my silver gel pen. I knew mine would overlap a bit so I rolled it around to make sure my stitches wouldn't get lost when glued on. You can see in the picture on the right that if I would have just applied the stitching to the edges it wouldn't have shown up when glued on to the roll. I also decided that I didn't like the whole red on red look, so I used the silver gel pen to outline some of the words and hearts.
**I used another stamp (stamp not shown) that reads "hugs & kisses"
Before gluing the paper onto the roll, you will want to use just a little paint on the inside and outside ends of the roll. This just makes it a little "prettier" so you don't see the kraft color when you look at it. You don't have to do this step and you can paint the whole thing if you want, but I chose to do just a little. You could even use your ink pad if you don't have the right paint color. Once the paint dries, apply glue to the back side of your paper and then roll it up.
Take your tissue paper and add a couple inches to each side in the length. This will allow you plenty of extra so you can twist and tie the ends.
Place your candy of choice. (I think this is about 13 hugs & kisses)
Twist the ends and then tie your ribbon.
I apparently deleted some photos I was going to use for the tutorial, but you can see how I finished it off here. I tied the ribbon to each end and then applied glitter foam stickers. You can embellish this however you want.
I hope you enjoyed the tutorial. It is super quick and a great way to use some of your supplies when you don't always have what you are looking for and is pretty inexpensive. I only had to buy the candy and the cute felt 'bucket' was from the dollar bin at Target. SWEET!!!
Linking up over at:
The Blackberry Vine
Tip Junkie


No comments:
Post a Comment
Your comments mean so much!