As some of my readers know, my "baby" sister graduated high school in May. And now that she is off to college and has started her first semester *sniff, sniff.* I thought "better late than never" sharing what we did for her Graduation Open House. I know, I know this is long over due and I know school is back in session for most and you aren't even thinking about graduation, but if you have a senior or even a little one that you will be planning a graduation event for let me tell you, it is NEVER to early to start planning!!! So I decided to go ahead and share this post with you and will probably re-share as graduation time approaches.
So my sister decided she wanted to use Dr. Seuss' "Oh The Places You'll Go" as her theme and wanted to include a "candy bar." Quick funny story, when my mom was explaining the idea of the "candy bar" to my dad she said "And she wants to have a candy bar" he said, "what kind?" So mom had to explain she didn't want a candy bar, but rather a bar full of candy... I LOVED it and just started laughing, he he, sometimes guys just don't get us do they?!? :-)
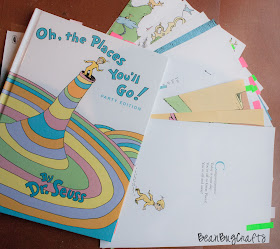
| Dr Seuss "Oh The Places You'll Go" on Amazon Anyhow, so that was pretty much the theme of her Senior Year that went straight into her Graduation Open House. Now, I'm not sure if you've ever read that book, but I did and I cried and then read it again and cried (Yeah, I'm like that.) Each time I read it a different section would make me cry. So when I was asked to make her banner I decided I totally wanted to include the book. I mean, THE actual book, so that's what I used and I loved how it turned out! |
First, I read through the book again (no crying this time, it was all about the banner and not my sister) and decided which pages were my favorite and what I thought would be the most applicable.
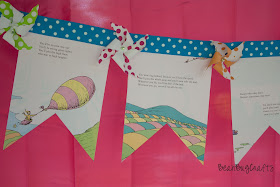
So I made a template of the banner and made sure it would be able to include all the text and most of the images. I couldn't get a couple of the pages to fit the template quite right so I left them in a rectangle shape and placed them as the second ones from the end and it worked out great! So just play around with your template or sketch it out on paper until you get what you like.
To attach the pages, I originally planned to sew the pages to the ribbon but after one page I ran out of bobbin thread. It was 3am in the morning on my mom's machine and I just wasn't in the mood to figure out how to thread her bobbin so I decided to hot glue the pages onto the ribbon. Of course, the next day when I was talking to my mom she reminded me how easy her machine was to thread and drop the bobbin and I just had one of those "hit myself in the head, O'iyee moments." Anyhow, it worked out good and still looked nice. I should mention that if there is any chance of it being windy that you not sew because the needle will perforate the paper and you run into the chance of having your paper tear off the ribbon and that would be sad :-(
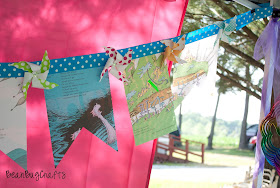
I made 4-inch wavy pinwheels (working on a tutorial with template for this so be sure and check back) and then hot glued them to medium size clothespins. When I attached the pages I made sure to space the pages so that I could fit in the pinwheels in between each page. (please note the pinwheels did not spin, I would have had to do a little more with them to get them to spin.) And so sorry for this horrible picture, I was using templates to figure out the sizes for everything and I obviously missed all the paper debri under my workspace, I was just trying to get it done...
Anywho... Once the pages were attached to the ribbon I was then able to attach the pinwheels to the ribbon with the clothespin.
The only other thing to make note of is to be sure to leave enough room on each end for hanging.
And that's it. I think it turned out very cute, very whimsical and Dr Seuss-like. What do you think?
Be sure to stop by the other posts for the Dr. Seuss Theme Open House:


No comments:
Post a Comment
Your comments mean so much!