Monday, February 13, 2012

Re-purposed Valentine's Treat Holder

Since I'm kind of busy trying to put together a 1st Birthday Party, I thought I'd take a break from the Scrapbook throwdown and share with you a couple of small Valentine's crafts I did for the kiddo's. I'm sure you've seen something similar online, but here is my version.

Using supplies that I had on hand, and re-purposing a toilet paper roll, I came up with a cute Valentine to hold some Hugs & Kisses. 


Supplies: 
Toilet paper, Paper towel, or gift wrap rolls
Tissue paper (mine shown is being repurposed, works perfect for this project)
Cardstock 
Stamps
Inks
Glue Stick
Paper Trimmer
Ruler
Paint and Sponge Brush
White or Silver Gel Pen (not shown)
Ribbon for tying
Candies

First you want to measure the length and width (circumference) of your Toilet paper Roll. 

Trim paper to correct size. 


I didn't have any Valentine Theme printed patterned paper (I have NO Idea why???) so I decided to make my own. (*Remember I'm keeping this task to supplies on hand. ) So I used the "Happy Valentine's Day" stamp I had, and using red ink, stamped the image to the center of the paper. 

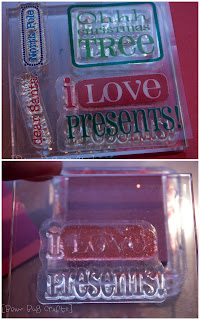
Again, like paper, I don't have a lot of Valentine Day stamps so I'm using a Christmas stamp so I can stamp the word "Love". I've only applied red ink to the love portion and then stamped my paper. The clear stamps make this step so much easier! 

I took my paper and started to apply "stitches" with my silver gel pen. I knew mine would overlap a bit so I rolled it around to make sure my stitches wouldn't get lost when glued on. You can see in the picture on the right that if I would have just applied the stitching to the edges it wouldn't have shown up when glued on to the roll. I also decided that I didn't like the whole red on red look, so I used the silver gel pen to outline some of the words and hearts. 
**I used another stamp (stamp not shown) that reads "hugs & kisses"

Before gluing the paper onto the roll, you will want to use just a little paint on the inside and outside ends of the roll. This just makes it a little "prettier" so you don't see the kraft color when you look at it. You don't have to do this step and you can paint the whole thing if you want, but I chose to do just a little. You could even use your ink pad if you don't have the right paint color. Once the paint dries, apply glue to the back side of your paper and then roll it up.

Take your tissue paper and add a couple inches to each side in the length. This will allow you plenty of extra so you can twist and tie the ends. 

Place your candy of choice. (I think this is about 13 hugs & kisses)

Twist the ends and then tie your ribbon. 

I apparently deleted some photos I was going to use for the tutorial, but you can see how I finished it off here. I tied the ribbon to each end and then applied glitter foam stickers. You can embellish this however you want. 

I hope you enjoyed the tutorial. It is super quick and a great way to use some of your supplies when you don't always have what you are looking for and is pretty inexpensive. I only had to buy the candy and the cute felt 'bucket' was from the dollar bin at Target. SWEET!!!

Linking up over at:
The Blackberry Vine
Tip Junkie
Cherished Bliss Pin It

Thursday, February 9, 2012

Scrapbook Challenge Throwdown: Day Two

Day Two's Challenge was Color Scheme. Latrice shared this color scheme (found via Pinterest) with us and that's what I went with. I had a couple of different sets of pictures in mind to use for it and I'm happy with the result.


In the process I found out I don't have a lot of different shades of orange. Most of what I have are bright summer tones or "Halloween" orange so good to know orange is not a color I use often. I don't mind orange, and really was quite surprised I didn't have much. Oh well, that's what part of this challenge is about.

I decided I just couldn't part with any of the photos so I made a two page spread. You know how it is as a mom, every little expression is different and no two are the same? Yep, that's me! Every cute face this little guy makes is super special to me!

Quote on the right side of the layout reads: "If you want to be happy, be!" Leo Tolstoy


I loved this "polaroid" look that Latrice had on her example so I wanted to duplicate it on my layout. I think it turned out pretty cute~

I added machine stitching to both sides of the layout. I used a straight stitch and a zig-zag stitch. The stitching on the lower dark blue border piece was purposefully meant to be not straight. The layout was looking to "clean" and I couldn't handle it so I added some curves! 

The flags were hand cut with coordinating paper and word stickers added.  
Title Cut out using Cricut Expression 2 cartridge "Alphabet"

The "B. You" is from a recycled booklet that came with one of the kiddo's toys. It had all kinds of different "B" quotes and sayings. 

I think I did pretty good with the color scheme, what do you think? Be sure and some back for Day 3, the challenge is stitching, I can't wait!!! 

Pin It

Tuesday, February 7, 2012

Scrapbook Challenge Throwdown: Day One

Hey All!
Last week I found out about a " 10- Challenge Scrapbook Throwdown" so my crafty BFF and I signed up. Yesterday was Day One and the challenge was 4x6 layouts, and as ridiculously late as I stayed up to do it, I actually finished Day One!!!

It has been FOREVER since I have actually scrapbooked. I've been to busy crafting and just haven't had it in me, which is why I thought this challenge would be good. These photos are from 2006! WOW! But hey, the pics are finally scrapped and now I don't have to throw (pun intended) them around anymore :-)

It was a rough start, but this is what I came up with. Enjoy!


Supplies: Mostly Recollections, My Mind's Eye, & K&Company

I can't wait to see what the other days are going to be having us do! What do you think for my first try in awhile? Pin It

Wednesday, February 1, 2012

A Winter "One"-Derland Birthday Party!

Baby Girl turned one this month and it is so hard to get my head wrapped around it! Crazy to think of all the things she is doing now, it really does go by way to fast! Ever since I was pregnant with baby girl, I knew that since she was my winter baby that I wanted to do a Winter "One"-derland theme party. So that is what we did!


Snowglobe Shaker invite. 

The Inside. Stamped with all in the party info and ribbon and snowflake sequin added. 
I do love the way the invitations turned out, I just wish they would have went a little smoother in the production and the supplies. (sorry for the picture quality, I took them with my phone)


I love how the Birthday banner and the Highchair banner turned out! Once I we ( hubby helped on this too) found the papers I was happy because the colors were exactly what I wanted.

And I just love balloons at a party, especially for a toddlers birthday party because they love balloons! Besides getting balloons in clusters I like to get several of them loose so the kids can play with them AND they make great favors for the little ones to take home! The best part about these balloons is, they were last minute (because I wasn't able to get out with the kids to order them) so hubby was in charge of ordering them for me. He did GREAT! They all matched perfect and I loved the silver ones with snowflakes! Thanks Babe!

Yes, I know I need some candles. 

I also made a snowglobe photo banner displaying baby girl from newborn through twelve months! My how she has grown, pigtails and all!!! 

We had some other miscellaneous decorations that made great table scatter and window decorations. Most of these decorations were found at Wal-Mart in their after Christmas Clearance racks. I love saving money! 

We took Jumbo Marshmallows added skewers, then dipped in white candy coating then sprinkled them with pink sugar. We displayed them in little galvanized buckets. They acted as table decor and also as favors. We put one Dipped Jumbo Marshmallow in a brown paper sack with a packet of instant hot cocoa. 

It's the best pic of the marshmallows I got

Snowman Gift tag hung from pretty garland. 

Large foam snowflakes found in the craft department at Wal-mart were perfect for table decorations.

The entryway with a silhoutte of baby girl and her crazy hair. Thanks to her Grammy for that! I had made up a subway art to display here as well, but apparently I didn't get it printed like I thought so I didn't have it here at the party, but will hang it in her room. 

This is the adorable onesie her Grammy made for her based off of the invite. Isn't it adorable! 


She wore the onesie and a matching tutu that I made. She LOVED the tutu! 100% girl there! 

So now for the food part of the party. We tried to keep this part simple for us and kid-friendly. We ended up picking up some pizzas from Costco (FYI: most kids prefer cheese pizza over any meat pizza!). We had a fruit and veggie plate, I had made up some Mexican Wedding cake cookies (they were our snowballs), and chips. Super simple but still appropriate. 

Yeah for cake and cupcakes!
I was super excited about how the cake and cupcakes turned out!

The cupcake toppers were made using paper straws that I purchased from Cakes and Kids Too Etsy Shop. I would totally recommend purchasing from her. She was able to combine my shipping and she did a custom order for me. And the best part, the color in the images were exactly what I was looking for so everything matched exactly how I wanted it to!

We made a total of 48 cupcakes, 24 cupcakes with toppers and then the remaining cupcakes went on this cute adorable cupcake stand that I found at Target! I love it and it went perfect for with our party!

I also designed the cake! Hubby helped by putting it back together again, because when it came out of the oven it it looked more like this...

Instead of this...

I made the cake banner with the same straws as the cupcake toppers, bakers twine, and my Cricut Expression 2. (The pennants were actually hand cut by me). The snowman was made of rice krispie treats rolled into balls then dipped in white chocolate candy coating.

Overall, it was a very fun party and we were so happy to be able to celebrate our baby girl's first year of life with some great friends. Thanks to everyone who helped celebrate!


*For the decorations and invitations I used my Cricut Expression 2 die-cutting machine, the "Alphabet" cartridge that comes with it, and "A Child's Year" (Which is one of my absolute favorite cartridges!), and the new Cricut Craft Room
Disclosure: All decorations are my own original ideas and the products I used are my own . I was not compensated in anyway for this party, believe me! Please, if you wish to share my ideas or duplicate, link back to my post and give me credit. I would love to come visit you. You may NOT share pics of my kiddo's. Thanks!

Fun Stuff Fridays DearCreatives you are talking too much Pin It Follow my blog with Bloglovin
Related Posts Plugin for WordPress, Blogger...