Showing posts with label Christmas. Show all posts

Wednesday, December 21, 2011

Last Minute Christmas Gift Ideas!

I didn't think I was going to have another post for you all before Christmas, but I remembered I had started this one! I didn't want to wait until next year, because I think they are some really cute ideas!! 
**If you were here earlier, and had trouble with some of the links, I think I've fixed them! Enjoy**

My little guy would love playing with this playdoh, good luck trying to keep him from eating it though! 

A super yummy, (at least it looks yummy) cookie mix, and so festive with the peppermint!

I think this is perfect for a crafty guy. I would throw in a few clamps, a pair or work gloves, and I always get my man a new level. (It's a joke we've had for a long time, I think my husband has the most levels ever!)

I could always go for a new, cute apron! How adorable is this?

I know I would love something like this! Throw in a couple of cookies cutters and call it done!! This site has LOTS of ideas for different types of bakers! Be sure and check them out. 
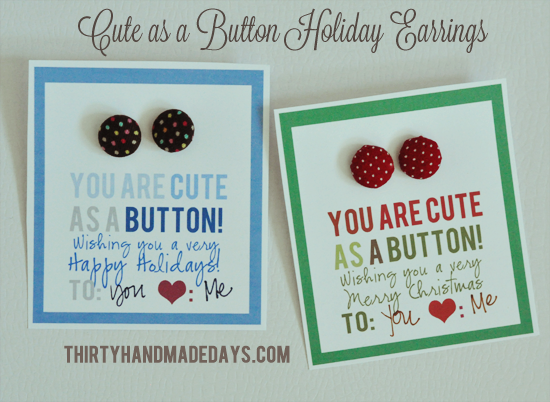
I haven't seen anything as cute as this! Perfect for any little girl who loves earrings!

This would make a great teacher gift or gift of the office supply lover (aka: my dad!)! Don't forget to go to the site to download the free tag for your hi-lite goody bag!


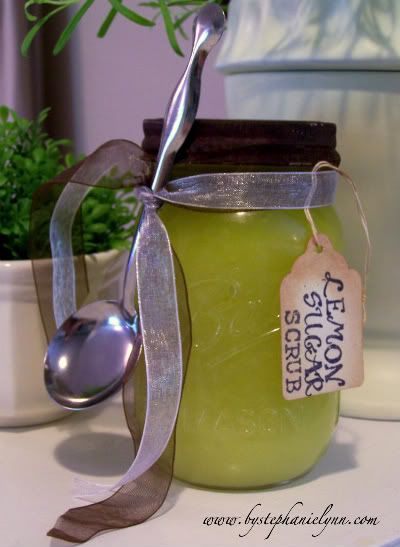
How about a little pampering? Here are a couple of different gifts for spa like treatments!

Photo: The Gunny Sack
Need a few more different {Everything} In A Jar Ideas? This post has some great ideas with free printables!
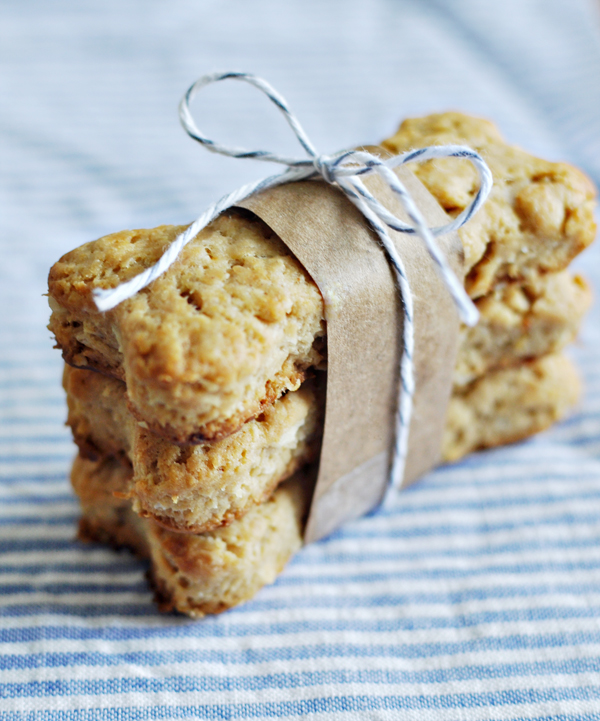
And let's not forget about our furry friends! My Molly Jo Dog l would love some of these!

No time to put together a jar gift? Well grab a gift bag and some scrapbook paper and throw this adorable gift together! I may have to do this next year instead of baking the goodies....

I hope you all have a Merry Christmas! Enjoy the time with your family & friends and please remember the Reason for the Season, the birth of Jesus Christ! You can find the story of Christmas here! 

Merry Christmas!


Monday, December 19, 2011

Christmas Tutorial: Semi-Homemade Christmas Card & A Giveaway

I wanted to share with you all the Guest Post I did over at Dear Creatives last week on how to make a "Semi-Homemade" Christmas Card. There is also a giveaway for the winner to receive a set of eight of these very cute Snowman Greeting Cards. Be Sure to head over to the Guest Post to enter for your chance to win.

Today I'm going to show you how to make a "Semi-Homemade"  Christmas Card. If you are like me, you like to make homemade things or maybe you would like to try to make something homemade, but you just don't think you are all that "crafty." Well, this is a quick, cute way for anyone to dress up a boxed set of Christmas cards to give it that homemade touch!


Supplies:
Set of boxed of Christmas Cards: I got mine from the Dollar Bins at Target
*Embellishments: I used a variety of rhinestones with different colors and sizes
*Ribbon
Stamps and Ink
Scissors
Liquid Adhesive
*Decide how you would like to embellish your cards. I think these snowmen cards are cute as is, but I think they needed a little bit more so I decided to add rhinestones and ribbon.

Cut out how many ribbons you will need. I needed eight ribbon to add to the snowman for his bow-tie. They are pretty small, but they are just enough.


Once the ribbons are made, you will need to attach them. I used my liquid adhesive, but you could also use a hot glue gun. Just be careful when working with small ribbon that you don't burn yourself, I know I always do!


I then added a rhinestone to the center of each snowflake. The rhinestones I have already have an adhesive, but because the cards are going to be handled a lot I like to add adhesive to them just to make sure they stay on.


I decided I wanted to dress up the envelopes a bit too. So I used a small square snowman stamp and my red ink pad and stamped the image in the lower left corner.

There you have it! Quick, easy, and cute!

Thanks for having me! I hope you liked the tutorial and are able to find some boxed cards so you can make them "Semi-homemade!"

Now, how would you like to win a set of eight of the snowman cards I just showed you? Well, here is your chance. One lucky winner will get a set of eight already "semi-homemade" cards and envelopes.

All you have to do is head on over to the Dear Creatives Blog where I did the guest post to get the details! There are super-low (ok, at this point no entries) so chances of winning are pretty great! Shipping paid by me!

Good Luck and I hope you found the tutorial helpful!


Pin It

Tuesday, December 13, 2011

Not Here Today! I'm Guest Blogging at Dear Creatives

Hey Everyone! I don't have a Tuesday Tutorial for you today on our blog, but I have one over at  Dear Creatives for you.
DearCreatives

You don't want to miss the tutorial, I'll be showing you how to turn an ordinary boxed set of Christmas Cards into something, well, "Semi-Homemade!"

And not only do I have a post there, but I also am sponsoring a giveaway for you to have a chance to win a set of eight Semi-Homemade Christmas Cards from yours truly! Giveaway Ends 12/18 @ 8pm PST.  

So be sure and stop over to get the tutorial and to enter for your chance to win a set for yourself.


Dear Creatives is also having a Holiday Hop where you can vote for your favorite Holiday Craft or Recipe. I've entered my Christmas Cone Advent Tutorial. Please take a second to go vote! Thanks!

And, don't forget about the giveaway going on here from Platterpuss Platters. It ends 12/15/11 @ Midnight EST.

I know this is a busy week for most. Be sure and take some time to enjoy the little things and the things most important to you. It's so easy to get caught up in the hustle and bustle of things and forget why we are so busy in the first place. I know I took, and am taking, some time to spend with my kids and husband. Don't let the Holiday Season pass you by without remembering the reason for the season and actually enjoying it with the ones you love!

Have a great day! Hope you enjoy the tutorial!

Saturday, December 3, 2011

Christmas Cone Advent Calendar Tutorial

Advent Calendars and Countdowns to Christmas, these are traditions that we never have had before. The only thing close to a "countdown" would be the December Daily album I did last year. So I started thinking, "Do I want to do an Advent Calendar?" If I do how do I want to do it and how much money do I want to put into not only the calendar, but the tokens and gifts for each day? Or do I just want to have an Advent Calendar of Activities? So many choices, what to do? Well, I came up with one that can hold a chocolate or two just right :-) or could even hold a small ball or matchbox car!

So I did it and I love it and want to share it with you today!

Supplies:
Paper: 9 sheets of 12x12 patterned Christmas papers (I used 7 different styles of coordinating patterned paper)
Adhesive: I used a glue stick and scotch tape
Various small tags
Printed Numbers or Sticker Numbers
Ribbon
Scissors or Paper Trimmer
Hole Punch
Hershey Kisses or Other Candy or small gift

Take your 12x12 sheet and fold point to point, cut along fold line to get two triangles.


Then take only one of the triangles and fold again point to point, and cut along fold line to get two smaller triangles. You should have one large triangle and two small triangles from one 12x12 sheet of paper. Do this with the rest of your papers mixing up the sizes until you have a total of 25 large and small triangles.

This is where it gets tricky. If you've made your own pastry bags it might not be as tricky, but I have made my own and I still find it tricky. Position the triangle so you are holding the main point in your left hand so that it creates the long line on the right side (top & bottom points on right side).


With the main point in your left hand, take the bottom point Roll it gently (don't fold) until the bottom point meets the main point. If you are using paper that is printed on one side and white on the other, the printed side should roll up and touch the white side. You will know if you got it right if it looks like it is starting to take the shape of a cone.

Now, take your glue stick and add glue to the edges of the top half of the triangle. This will help to hold your cone together as you roll and you will be able to use less scotch tape at the end.

Now wrap the top half of the triangle around the bottom half until the top point meets the main point on the backside of the cone. (You should have the bottom point on the inside and the top point of the outside of the main point). You may need to work with aligning the top edge but you can do it.


The point should not have a very big hole at all, if it does re-wrap the top half until you get it all lined up.

Now that all three points are where they are supposed to be and you like the way they are lined up, you can add some scotch tape, if needed, to secure it together.

Now the easy part. Take your numbers and place them on the cones!  I used my Cricut machine to make up various shaped tags and used various number stickers in coordinating colors.

Attach the number tags to the cones. I used my mini stapler.

Punch holes in back of cone for the ribbon. Tie the ribbon through the punched hole. Depending on where you will hang them will determine the length you will need. 

Now you are ready to hang your cones.

I chose to hang the cones on our little trees in the foyer. Bean will get to see it first thing in the morning and I think it looks super cute!

Hope you enjoy the tutorial and counting down the days until Christmas! Do you have an advent calendar or some way of counting down the days until Christmas?

This tutorial will be also be linked at the parties below. Be sure and check them out for some great ideas!

Dear Creatives Holiday Hop
The Kurtz Corner
Cherished Bliss: Craft and Tell
The Creative Spark
Ginger Snap Crafts
Handy Man, Crafty Woman
Fun Stuff Fridays
Serenity You


Totally Tutorials Blog


Tuesday To Do Party


The 36th Avenue


Tip Junkie handmade projects


Related Posts Plugin for WordPress, Blogger...