There are so many different ways to make a fabric banner and part of my problem is I wasn't sure how I wanted to do it. Well, I decided how and I made a Halloween Fabric Banner! I love how it turned out so much that I wrote up my first tutorial and I'm super excited to be sharing it with you. This was super quick & easy to make and if you wanted to get in a last minute Halloween project this would be perfect. I was able to make it in a couple of hours and that was with my two little ones awake!

I've tried to explain what I'm doing in the photos the best I can, but if I've missed something or if you have any questions or comments please feel free to share. If you make a banner using my tutorial please share your photos and link back and give credit to me. Thanks!
Here we go!
Supplies: fabric, ribbon or rick-rak (9 feet), thread, Pinking shears, scissors, sewing machine, pins


To make a quick template, I cut a 6x6 square out of a scrap piece of cardstock.

Fold the square in half, and draw a line from one point to the opposite point.

Cut along the line to get your template so you can start cutting.

Lay the two pieces of fabric WRONG sides together. Leave them this way because this is how you will sew them (wrong sides together). If you are doing a single sided banner you don't have to worry about this.

Since I don't have a pair of pinking shear scissors, I used my pinking blade on my rotary cutter to cut out the triangles

After I'm done cutting them out, I leave the two pieces together.
Remember: This is how you will sew them (wrong sides together)

After you get all your triangles cut out, you are ready to top-stich and sew the two pieces together.


I used a 1/4 inch seam allowance (butt the points of the banner to the edge of the presser foot).

When you get to the point, slow down. With the needle still in the fabric, lift your pressor foot, then pivot your triangle around your needle. You don't want to sew all the way to the end (you will be doing one continuous stitch).


Examples of how the stitching doesn't go all the way to the end.

Arrange the triangles in the order you want. I didn't get to crazy with putting these in order, I just wanted to make sure I didn't have the two white ones next to each other.

Decide how much rick rack/ribbon you will need on each end to tie or hang your banner up. I left 12 inches on both sides to ensure I had plenty to tie. I placed a pin 12 inches in on each end just to remind me of where to start and stop sewing.

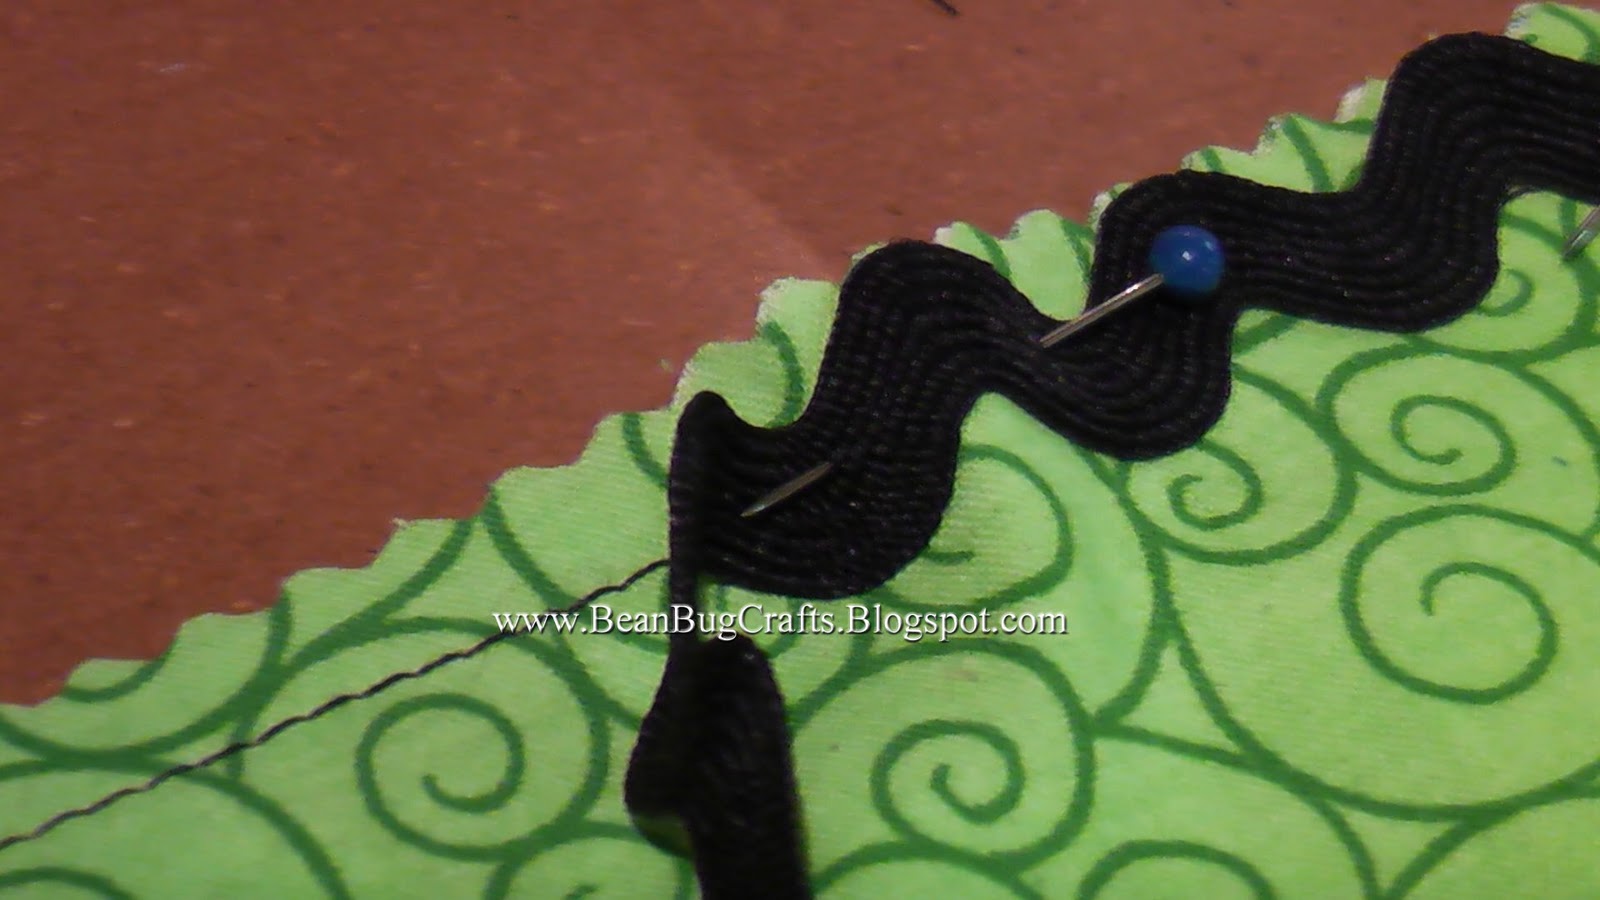
To make sewing a little easier for me, I pinned the triangles to the rick rack. This helped me to make sure 1) it was being sewn on straight 2) to ensure the rick rack would cover the topstitching
Now that you pinned your triangles down, you are ready to sew them together.


I sewed with the same seam allowance as before ( 1/4"). If you align your points up to the presser foot you should be sewing down the center of the rick rack.
Continue until you get to the end.
If needed, press with iron. Now you are done and ready to hang your banner!

I LOVE how my banner turned out! Let me know what you think of the banner and if you use my tutorial please leave feedback.
Thanks!
Need more Halloween ideas? Check out my other post Last Minute Halloween Ideas
This tutorial was featured at:

This blog post will be linked up at these fun parties, be sure to check them out!
Simply Designing
Fingerprints On The Fridge
It's Fun To Craft
Chic On A Shoestring Decorating
I Am Along For The Ride


Such a cute banner - love the ric rac! And you can absolutely share my trick-or-treat treasure hunt with your readers ... just please include a link to my original post :)
ReplyDeleteHave a great rest of your week!
keri
shakentogether.blogspot.com
Great job! I like how you used all the different coordinating fabrics for a fun but cohesive look! Would you share it here?
ReplyDeletehttp://oneartmama.blogspot.com/2011/10/falling-for-crafts-challenge-7-holiday.html
This is awesome.. Great neat idea..I love it... I would LOVE for you to share this at my Pin'Inspirational Thursday linky party if you dont mind pweeease :))-- TY,, http://theartsygirlconnection.blogspot.com/2011/10/pininspirational-thursdays-linky-party_26.html -- Officially following ya with smiles.. SO much creativity here.. : ))
ReplyDeletePS: Hope you can join myself and 50+Blogger's in going PINK for Breast cancer Oct 30th if it fits your schedule.. Have a look, would LOVE for you to join in.. :)) TY
Wishing you a lovely start to your weekend..http://theartsygirlconnection.blogspot.com/2011/10/paint-your-blog-pink-awareness-faith.html
Thanks for linking up whith me! This is a super banner tutorial! I love how it turned out. Link up any time with your crafts, recipes & other! Have a great weekend! Theresa @ DearCreatives.com
ReplyDelete