Tuesday, December 13, 2011

Not Here Today! I'm Guest Blogging at Dear Creatives

Hey Everyone! I don't have a Tuesday Tutorial for you today on our blog, but I have one over at  Dear Creatives for you.
DearCreatives

You don't want to miss the tutorial, I'll be showing you how to turn an ordinary boxed set of Christmas Cards into something, well, "Semi-Homemade!"

And not only do I have a post there, but I also am sponsoring a giveaway for you to have a chance to win a set of eight Semi-Homemade Christmas Cards from yours truly! Giveaway Ends 12/18 @ 8pm PST.  

So be sure and stop over to get the tutorial and to enter for your chance to win a set for yourself.


Dear Creatives is also having a Holiday Hop where you can vote for your favorite Holiday Craft or Recipe. I've entered my Christmas Cone Advent Tutorial. Please take a second to go vote! Thanks!

And, don't forget about the giveaway going on here from Platterpuss Platters. It ends 12/15/11 @ Midnight EST.

I know this is a busy week for most. Be sure and take some time to enjoy the little things and the things most important to you. It's so easy to get caught up in the hustle and bustle of things and forget why we are so busy in the first place. I know I took, and am taking, some time to spend with my kids and husband. Don't let the Holiday Season pass you by without remembering the reason for the season and actually enjoying it with the ones you love!

Have a great day! Hope you enjoy the tutorial!

Friday, December 9, 2011

Freebie Friday: Platterpuss Platters

**UPDATE: GIVEAWAY CLOSED, ALYSSA YOU ARE THE WINNER** 
It's Freebie Friday again! We've had such great sponsors throughout the past weeks and this is yet another one. Platterpuss Platters is our sponsor for this weeks giveaway, Thank you!


Michelle is the creator behind Platterpuss Platters and she shared with me a little about her and the inspiration of coming up with such a unique, cute Etsy shop. 

Michelle says: "I live and work in Southern California and lived here all of my 36 years, with my wonderful husband, Jorge. After losing my job of 11 years in 2009, I was anxious to take the opportunity to do something different - so I took my love of cooking and started baking cakes. After about 6 months, I realized I didn't have anything to put my delicious creations on -- Platterpuss Platters was born!" 

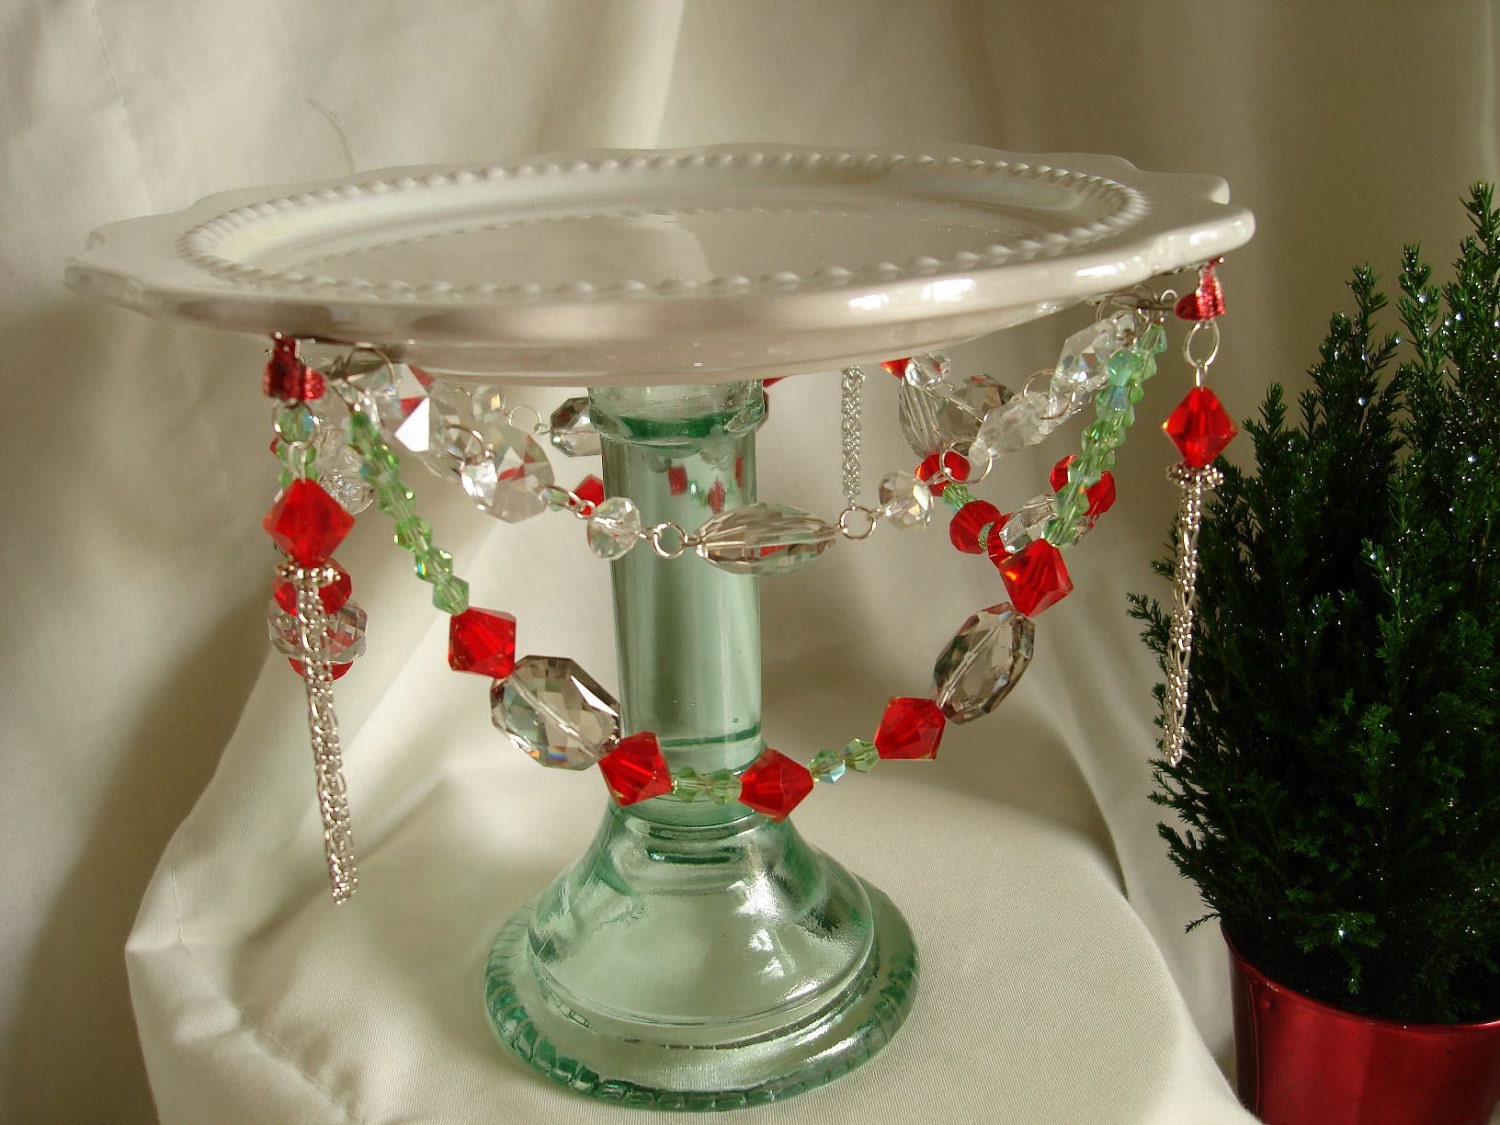
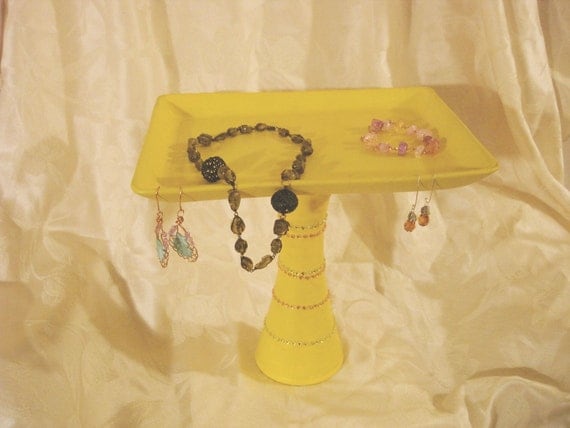
Here are a few of the beautiful platters you can find in the Platterpuss Platters Shop:

This A Very Bling Christmas is one of my personal favorites. Isn't it so festive?


You could use this Yellow Display Platter for so many different things. 

And how pretty is this Blue Bird Dessert Stand? What a great way to dress up your desserts!

**UPDATE: GIVEAWAY CLOSED**

So now for the giveaway! 


Pink and Blue Jewelry Dish with Necklace

This cute little dish is painted with chalkboard paint so you can be as creative as you want! The strands of pink coral and blue beads can be removed and be used as a necklace or bracelet 

So now for the rules (because there always are):


1. Add one of Platterpuss Platters items to your Treasury on Etsy or comment here your favorite item from her shop. Please comment on this post and let me know which you did.  This is the Mandatory Entry. 


2. Become a Follower of BeanBugCrafts (Right Side Bar; either email or Google Friend Connect) and leave a comment that you did so. If you are already a follower leave a comment that you already follow. This is an additional entry.
 
3. Like the BeanBugCrafts Facebook Fanpage and leave a comment here on the blog that you are now a new Facebook Fan or that you already are a fan. This is an additional entry. 

Only US shipping. Winner will be selected via Random.org. Contest will be over Thursday, December 15th at 11:59pmEST. The winner will have 48 hours (until Dec. 17th 11:59pmEST) to respond or I will chose another winner. Thanks and Good Luck!


Monday, December 5, 2011

Tuesday Tutorial: Guest Blogger Hot Chocolate/Coffee Dipped Spoons


Hi, I'm Stacey and I'm so excited to be here for Tutorial Tuesday.  I blog at Boy, Oh Boy, Oh Boy! As the name suggests, I'm a momma of three boys. When I'm not cleaning up after, washing and folding laundry for, or wrangling my rowdy crew, you can find me in my craft corner. I dabble in many crafty areas and am always looking for something new to try.


From time to time you'll find:


 -things for the boys


 - some quilting


 - and home decor and holiday projects


Okay, on with the tutorial.  I don't know about you, but I wrack my brain each Christmas, trying to come up with small gifts for our neighbors and my son's teachers.  I think I've got something this year that will please them all.  I think these are the hardest gifts to give since generally we don't know them extremely well.


This year we're giving Chocolate Spoons.  These are great for coffee lovers as well as those who like a little spice to their hot chocolate.  Once gifted, the recipient simply grabs their favorite heated beverage, adds the spoon, stirs and awaits the flavored goodness.


Supplies:

- plastic or wooden spoons

- milk chocolate chips and white chocolate chips

- embellishments ( candy canes, sprinkles, toffee, coconut ect.)

- microwave, hammer, waxed paper

- clear or decorated plastic bags, baker's twine or ribbon


1.  Crush your "larger" embellishments using a hammer and place in a small bowl.


2.  Melt your chocolate chips and white chocolate in separate bowls, in the microwave.  I started with 1/2 cup of chocolate chips, on high, for 2 minutes.  Stay right by the microwave and check in every 30 seconds or so.  Pull the bowl out every so often to check for melted-ness.  Once the chips are melted they are ready.  This can be a tricky process because if they are in too long they are going to turn crunchy instead of smooth.


3.  Dip each spoon in the melted chocolate, making sure to cover the entire spoon.


4.  Sprinkle one embellishment on each spoon and set aside on waxed paper to cool/harden.  Another embellishment option:  drizzle a milk/dark chocolate spoon with white chocolate or vise versa.


5.  Once the chocolate has set, wrap the top of each spoon in a small, plastic bag and tie with twine or ribbon.


You can skip this step and just wrap the container, but I feel like the individual bags keep the spoons fresh until they're ready to be used.


Thanks for letting me join in the fun today at Bean Bug Crafts!


Pin It


Stacey
http://boyohboyohboycrafts.blogspot.com
http://www.facebook.com/pages/Boy-Oh-Boy-Oh-Boy/135619179823735?ref=ts

Saturday, December 3, 2011

Christmas Cone Advent Calendar Tutorial

Advent Calendars and Countdowns to Christmas, these are traditions that we never have had before. The only thing close to a "countdown" would be the December Daily album I did last year. So I started thinking, "Do I want to do an Advent Calendar?" If I do how do I want to do it and how much money do I want to put into not only the calendar, but the tokens and gifts for each day? Or do I just want to have an Advent Calendar of Activities? So many choices, what to do? Well, I came up with one that can hold a chocolate or two just right :-) or could even hold a small ball or matchbox car!

So I did it and I love it and want to share it with you today!

Supplies:
Paper: 9 sheets of 12x12 patterned Christmas papers (I used 7 different styles of coordinating patterned paper)
Adhesive: I used a glue stick and scotch tape
Various small tags
Printed Numbers or Sticker Numbers
Ribbon
Scissors or Paper Trimmer
Hole Punch
Hershey Kisses or Other Candy or small gift

Take your 12x12 sheet and fold point to point, cut along fold line to get two triangles.


Then take only one of the triangles and fold again point to point, and cut along fold line to get two smaller triangles. You should have one large triangle and two small triangles from one 12x12 sheet of paper. Do this with the rest of your papers mixing up the sizes until you have a total of 25 large and small triangles.

This is where it gets tricky. If you've made your own pastry bags it might not be as tricky, but I have made my own and I still find it tricky. Position the triangle so you are holding the main point in your left hand so that it creates the long line on the right side (top & bottom points on right side).


With the main point in your left hand, take the bottom point Roll it gently (don't fold) until the bottom point meets the main point. If you are using paper that is printed on one side and white on the other, the printed side should roll up and touch the white side. You will know if you got it right if it looks like it is starting to take the shape of a cone.

Now, take your glue stick and add glue to the edges of the top half of the triangle. This will help to hold your cone together as you roll and you will be able to use less scotch tape at the end.

Now wrap the top half of the triangle around the bottom half until the top point meets the main point on the backside of the cone. (You should have the bottom point on the inside and the top point of the outside of the main point). You may need to work with aligning the top edge but you can do it.


The point should not have a very big hole at all, if it does re-wrap the top half until you get it all lined up.

Now that all three points are where they are supposed to be and you like the way they are lined up, you can add some scotch tape, if needed, to secure it together.

Now the easy part. Take your numbers and place them on the cones!  I used my Cricut machine to make up various shaped tags and used various number stickers in coordinating colors.

Attach the number tags to the cones. I used my mini stapler.

Punch holes in back of cone for the ribbon. Tie the ribbon through the punched hole. Depending on where you will hang them will determine the length you will need. 

Now you are ready to hang your cones.

I chose to hang the cones on our little trees in the foyer. Bean will get to see it first thing in the morning and I think it looks super cute!

Hope you enjoy the tutorial and counting down the days until Christmas! Do you have an advent calendar or some way of counting down the days until Christmas?

This tutorial will be also be linked at the parties below. Be sure and check them out for some great ideas!

Dear Creatives Holiday Hop
The Kurtz Corner
Cherished Bliss: Craft and Tell
The Creative Spark
Ginger Snap Crafts
Handy Man, Crafty Woman
Fun Stuff Fridays
Serenity You


Totally Tutorials Blog


Tuesday To Do Party


The 36th Avenue


Tip Junkie handmade projects


Related Posts Plugin for WordPress, Blogger...